Data mining, modeling and prediction in SPL
With the aid of YModel, SPL is able to implement a fully automated data modeling and prediction. This article will teach you the steps of how to do.
Ⅰ Configure YModel
1. Download and install YModel
Download at http://www.raqsoft.com/ymodel-download
Install YModel and record the installation directory, such as: C:\ProgramFiles\raqsoft\ymodel
2. Configure external library in SPL
ⅰ Copy files required for external library
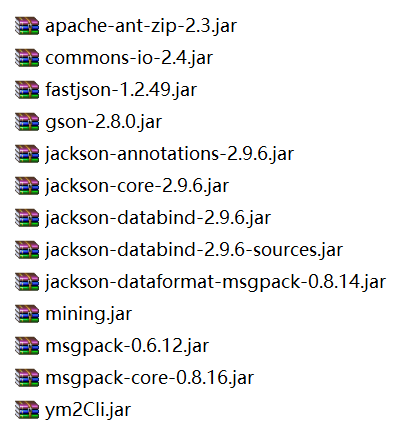
Find the following jar files in the installation directory of YModel and copy them to an external library folder, such as “C:\Program Files\raqsoft\esProc\extlib\Ym2Cli”.
ⅱ SPL environment configuration
a. Configure external library
Start SPL, and in Options menu, configure external library path and check Ym2Cli.
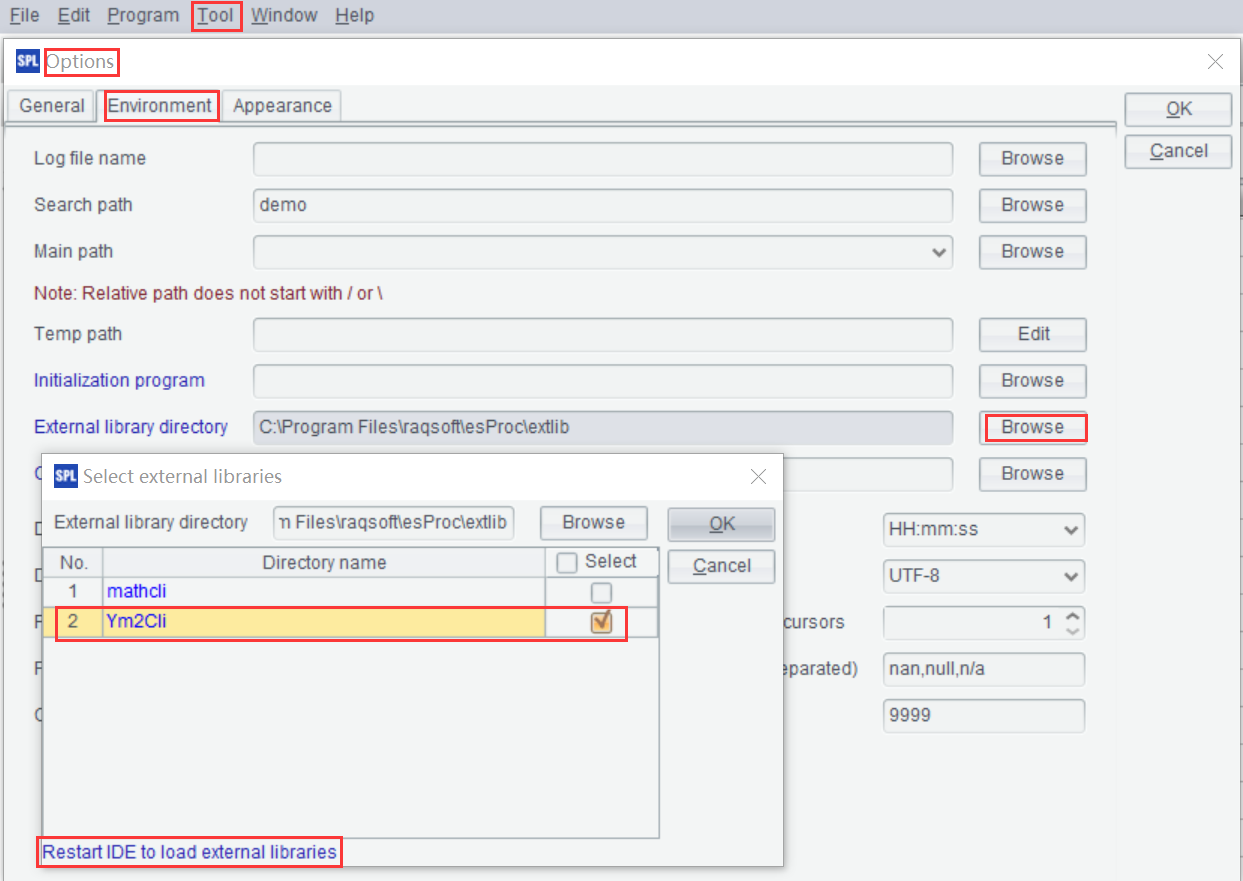
The path and name of external library are to be set in the file esProc\config\raqsoftConfig.xml, which is under the installation directory of esProc in the server without GUI.
<extLibsPath> external library path
<importLibs> external library name (multiple names allowed)
b. Set number of threads
If concurrent prediction is involved, it needs to set the “parallel limit” in SPL, i.e., the number of threads. You can set it according to their needs and machine condition.
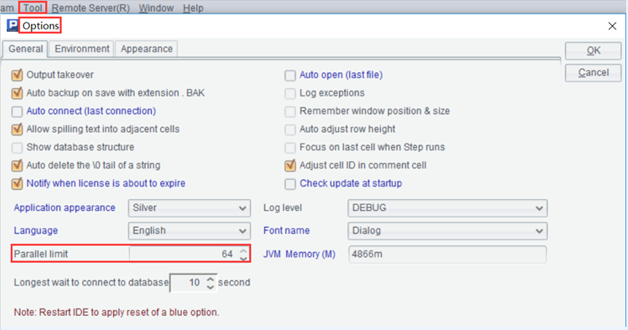
The parallel limit is to be set in the file esProc\config\raqsoftConfig.xml, which is under the installation directory of esProc in the server without GUI.
<parallelNum> Parallel limit
Up to this point, environment configuration is completed.
Ⅱ Modeling
1. Generate mcf file using YModel
Before building models in SPL, you need to use Ymodel to perform a series of operations, including data loading, target variable configuration, choosing variables and model setup, and save them in a mcf file. Learn the uses of Ymodel HERE.
Below is a loan default data table, and models need to be built to predict whether the default will occur on a new client.

Name the data file bank-full.csv.
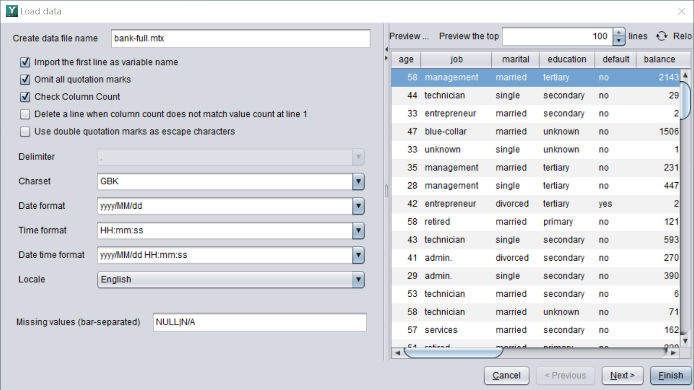
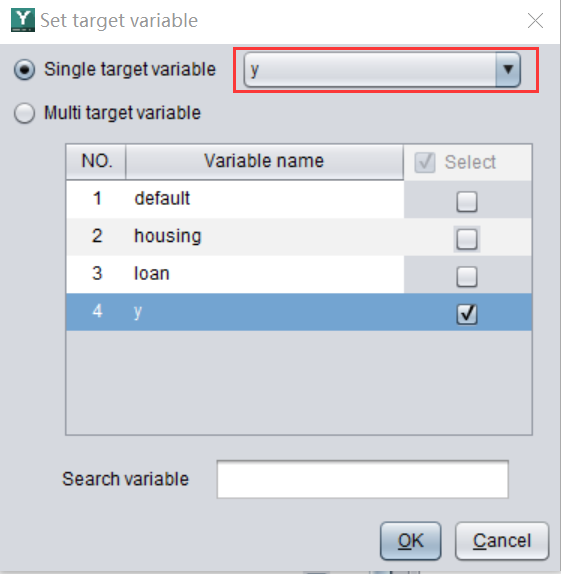
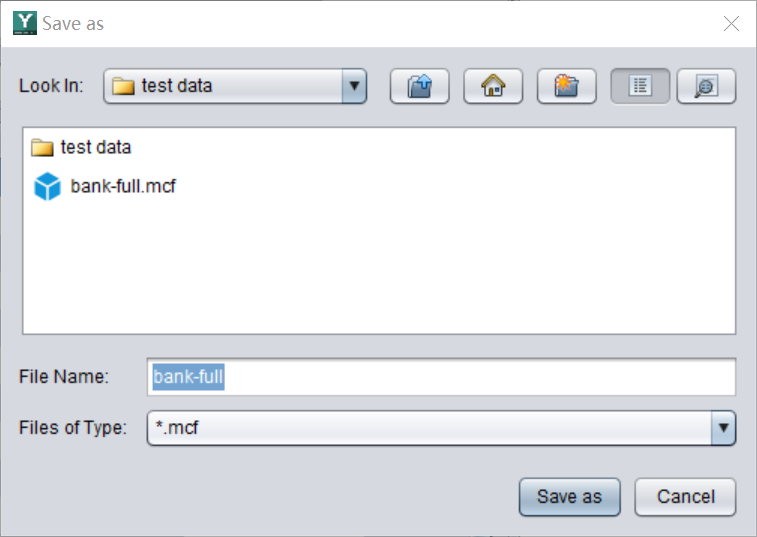
First, use YModel to import the data file, choose “y” as the target variable (the target to be predicted), and save the file as bank-full.mcf.
2. Import mcf file and build the model
Start SPL, import the configured mcf file, and begin to build the model.
| A | |
| 1 | =ym2_env("C:/Program Files/raqsoft/ymodel") |
| 2 | =ym2_mcfload("bank-full.mcf") |
| 3 | =ym2_model(A2) |
| 4 | =ym2_pcfsave(A3,"bank-full.pcf") |
A1 Initialize environment with ym2_env(appPath, configFile, pythonPath). appPath: installation directory of YModel; configFile: configuration file userconfig.xml. By default, uses do not need to configure the latter two parameters.
A2 Import the configured mcf file.
A3 Build the model.
A4 Save the model file.
3. Check model performance
| A | |
| … | … |
| 5 | =ym2_pcfload("C:/Users/29636/Desktop/tmp/bank-full.pcf") |
| 6 | =ym2_result@p(A5) |
| 7 | =ym2_result@r(A5) |
| 8 | =ym2_result@i(A5) |
| 9 | >ym2_close() |
A5 Import the model file.
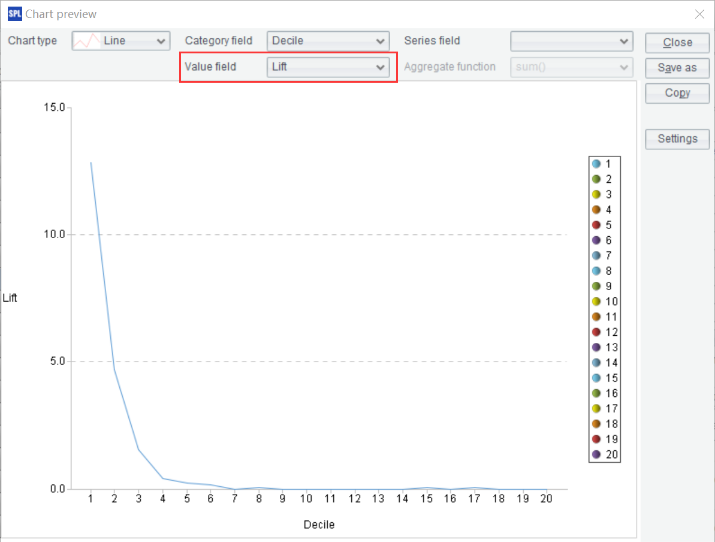
A6 Return multiple model performance metrics and charts, such as Gini, AUC, ROC, and Lift.

For example, click on the value of the 6th record of A6, then click on the “Chart preview” icon in the upper right corner, and finally select “Lift” in the value field, you can view the Lift curve.
A7 Return information and parameters of the modeling algorithm.

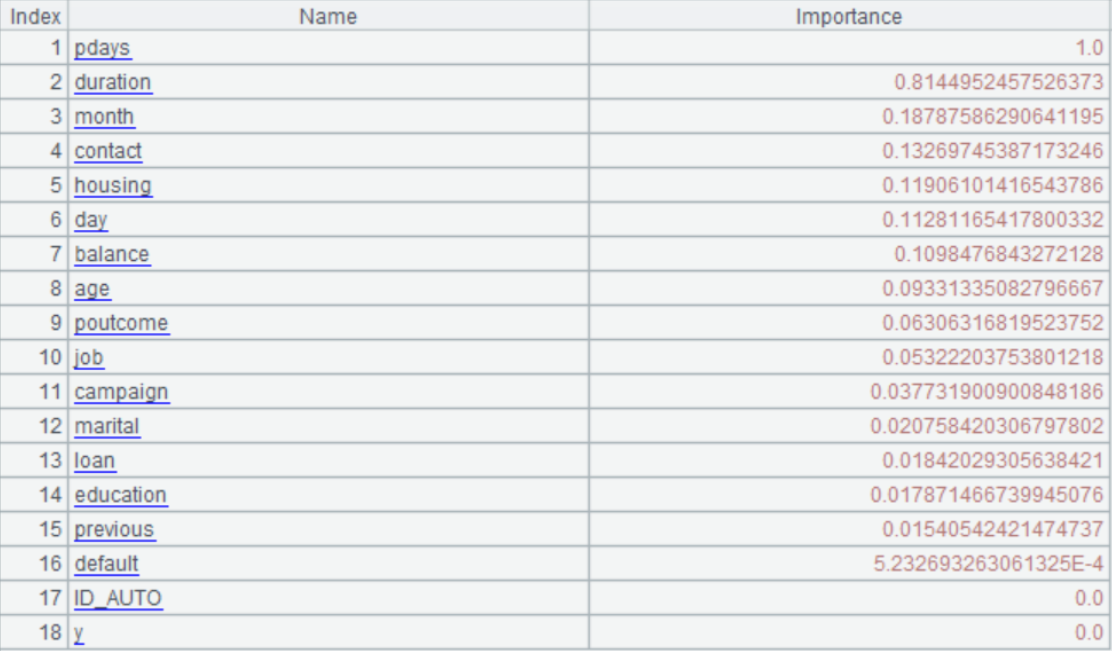
A8 Return the degree of importance (simply called importance) of each variable on the target variable.
A9 Close the YModel service and release resources.
Note: The results of A6, A7 and A8 can also be returned as JSON string format. To do this, just add j after the existing option, such as “ym2_result@pj()”.
Ⅲ Prediction
To perform the prediction, there should be the pcf model file and the prediction data set.
1. Data prediction
| A | |
| 1 | =ym2_env("C:/Program Files/raqsoft/ymodel") |
| 2 | =ym2_pcfload("bank-full.pcf") |
| 3 | =ym2_predict(A2,"bank-full.csv") |
| 4 | =ym2_result(A3) |
| 5 | =file("bank-full_result.csv").export@tc(A4) |
| 6 | >ym2_close() |
A1 Initialize environment.
A2 Import the pcf model file and generate the pd model object.
A3 Perform data prediction on the csv file. Besides the csv format, SPL also support txt file, cursor, table sequence and mtx file.
A4 get the prediction result.
A5 Export the prediction result. In this example, the prediction result is the probability of client default.

A6 Close the environment to release resources.
2. Data prediction in application
1. Initialize the environment and load the model at system startup
| A | |
| 1 | =ym2_env("C:/Program Files/raqsoft/ymodel") |
| 2 | =ym2_pcfload(pcf_file) |
| …【Multiple models can be loaded】 | |
| 3 | =env(YM,A1) |
| 4 | =env(YM_Model_xxx,A2) |
A1 Initialize environment.
A2 Load pcf model file and generate pd model object.
A3 Set A1as global variable.
A4 Set A2 as global variable.
2. Perform data prediction
Execute the following statement through SPL in application:
ym2_predict(YM_Model_xxx,pre_data)
In this way, the model YM_Model_xxx, which is loaded during initialization, can be used to predict and get the result. The pre_data in this statement is the externally transmitted data for prediction.
Learn the method of calling function in the upper application HERE.
This calling way will be executed immediately.
3. Close system to release the environment.
| A | |
| 1 | >ym_close(YM) |
SPL Official Website 👉 https://www.scudata.com
SPL Feedback and Help 👉 https://www.reddit.com/r/esProcSPL
SPL Learning Material 👉 https://c.scudata.com
SPL Source Code and Package 👉 https://github.com/SPLWare/esProc
Discord 👉 https://discord.gg/2bkGwqTj
Youtube 👉 https://www.youtube.com/@esProc_SPL


Chinese version: http://c.raqsoft.com.cn/article/1639102948649