

Office Add-in Service Installation and Configuration
Through esProc Desktop’s Office add-in service, you can use SPL.X() function to execute the SPL script, get the result set, and insert its data to Excel.
For the Windows system, download the latest version of esProc Desktop and Office Add-in patch package. First install esProc Desktop and then the Office Add-in Service.
For the Mac system, Office Add-in Service is built into the Desktop installation package.
For Windows
Both Windows system and Excel should be 64-bit.
Dependency files
nodejs: The directory where Node.js is located. The full path is【esProc Desktop installation directory】/esProcDesk/nodejs.
exceladdin: The directory where SPLforExcel add-ins are located. The full path is【esProc Desktop installation directory】/esProcDesk/exceladdin.
How to use the service
1. Start esProc Desktop, and click on【Tools】->【Start Office Add-in Service】.
Check 【Auto-Start Office add-in service】 and restart IDE to automatically start the Office add-in service at the startup of SPL IDE.
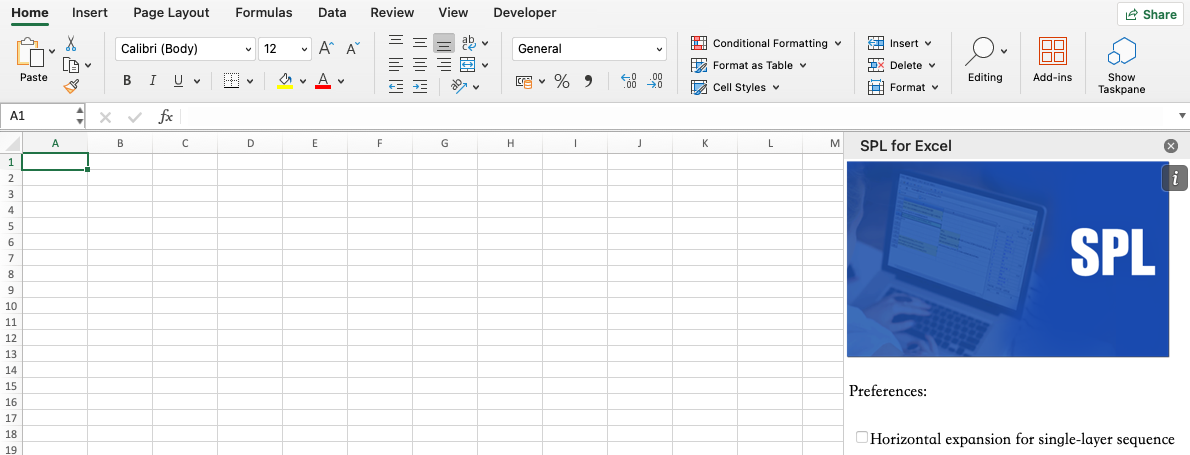
2. Open Excel (The version number of Excel2021 used in the following example is 2408), and load the custom SPL for Excel add-in through 【Options】->【Add-ins】.
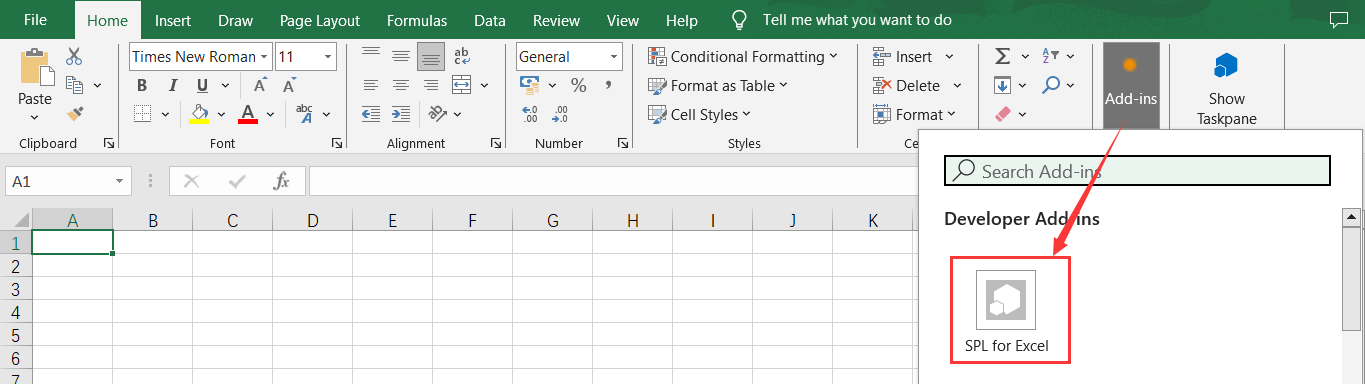
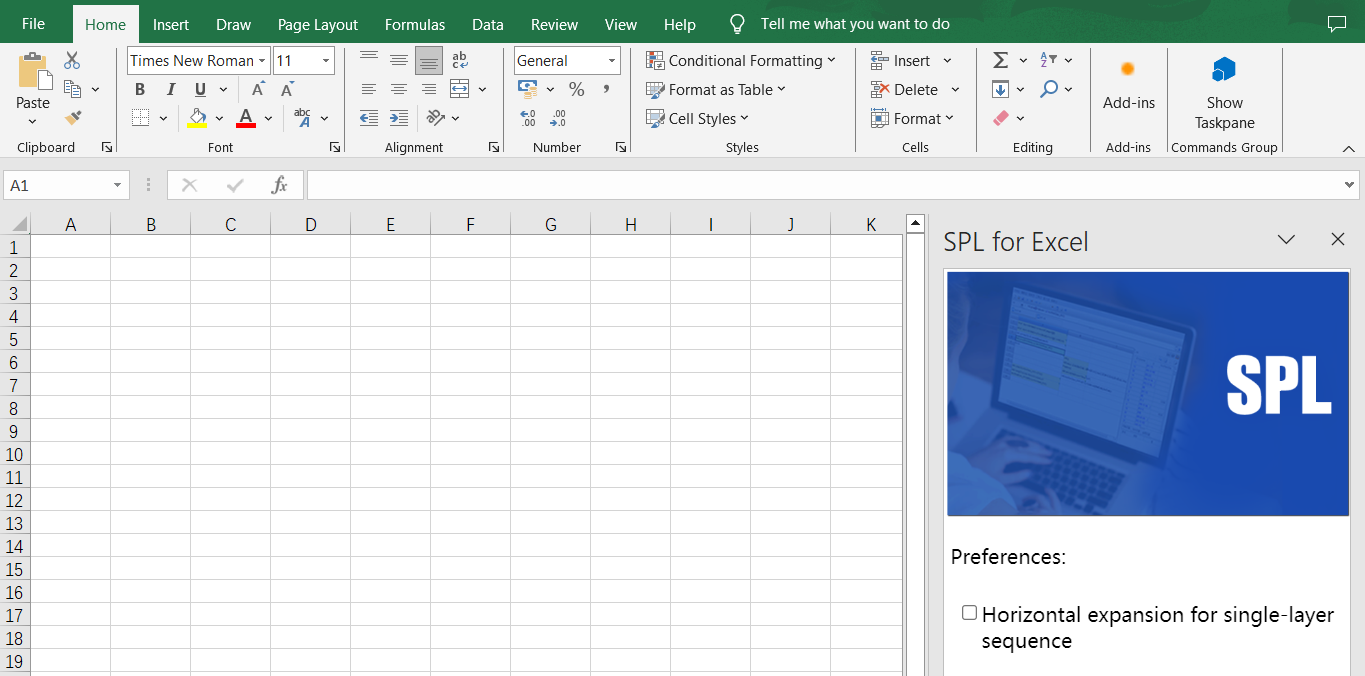
And you’ll get the following add-in:
3. Use =SPL.X() function in a cell.
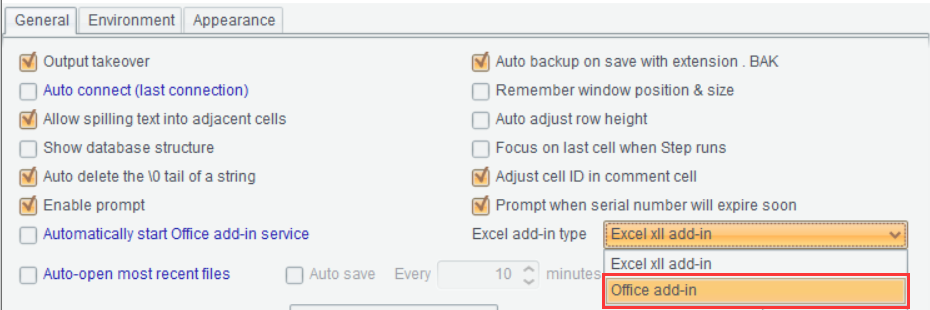
4. To use Excel Copy or Excel Paste functionality, just modify Excel Add-in Type -> Office Add-ins in the SPL IDE options.
FAQs
1. There isn’t the “Add-ins” option on the Excel Start screen.
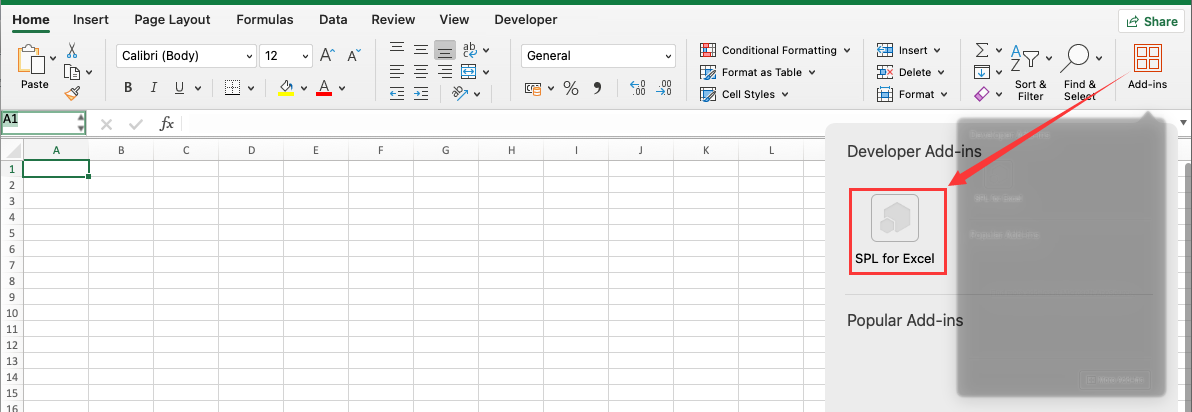
Open Excel, find【Add-ins】in【Options】->【Customize Ribbon】->【Main Tabs】->【Home】and check it.
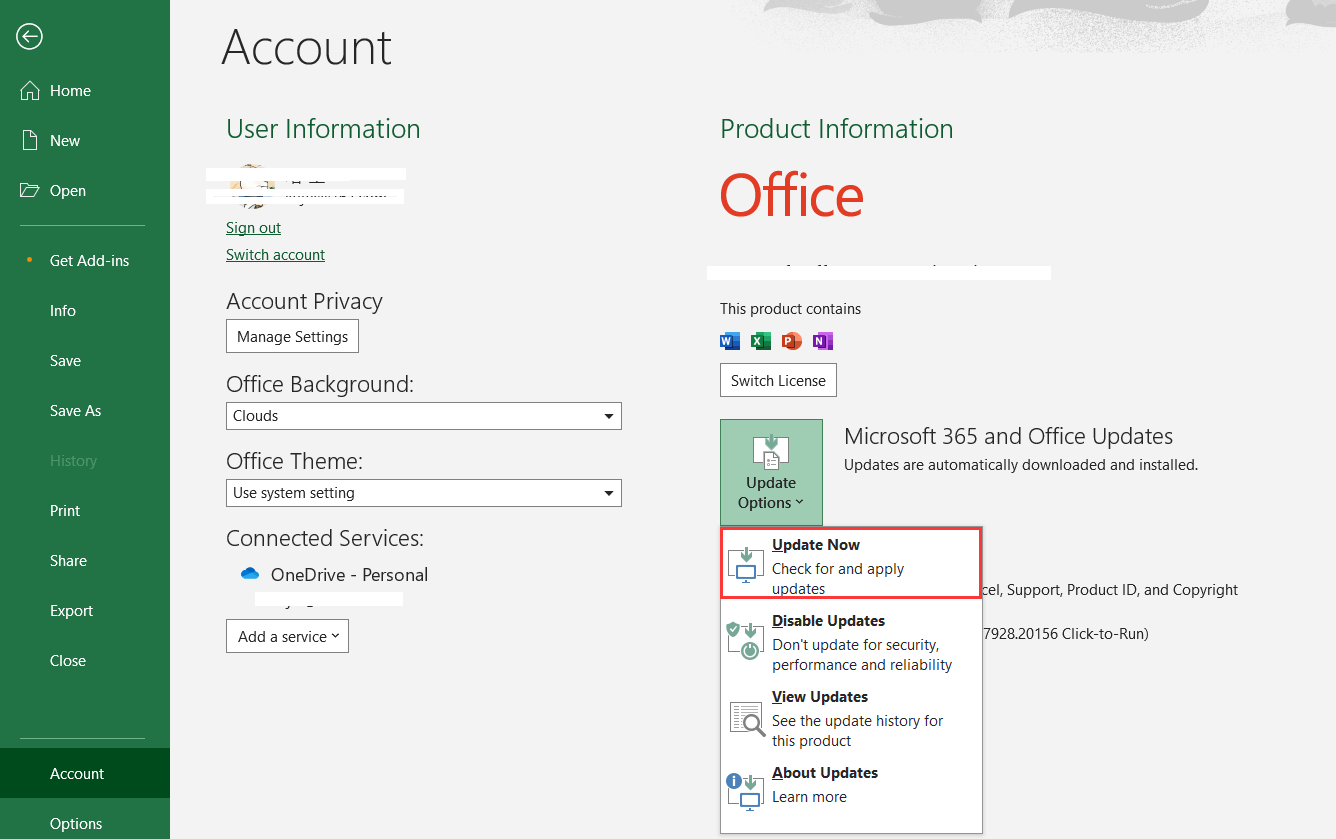
If you cannot find 【Add-ins】, click on【Account】->【Update Options】->【Update Now】 to update orupgrade Excel.
2. Modify Office add-in program and update the dependency files, but the modification does not take effect.
Clear cache, and delete all files in directory C:\Users\$\color{red}{[username]}$\AppData\Local\Microsoft\Office\16.0\Wef.
For Mac
Both Mac system and Excel should be 64-bit.
Dependency files
nodejs: The directory where Node.js is located. The full path is /Applications/esProcDesk.app/Contents/raqsoft/esProcDesk/nodejs.
exceladdin: The directory where SPLforExcel add-ins are located. The full path is /Applications/esProcDesk.app/Contents/raqsoft/esProcDesk/exceladdin.
startdevserver.sh and stopdevserver.sh: Starting and stopping dev-server, which are used to support SPL for Excel add-ins. The full paths are /Applications/esProcDesk.app/Contents/raqsoft/esProcDesk/bin/startdevserver and /Applications/esProcDesk.app/Contents/raqsoft/esProcDesk/bin/stopdevserver.
Establish a hard link
Link manifest file manifest.xml in exceladdin root directory to Excel’s wef directory.
Execute ln command in terminal:
'/Applications/esProcDesk.app/Contents/raqsoft/esProcDesk/exceladdin/manifest.xml' '/Users/ $\color{#FF0000}{[username]}$/Library/Containers/com.microsoft.Excel/Data/Documents/wef/a5f6b5ea-9bf1-4a7c-97ac-1759754457c3.manifest.xml'
Note:
-
$\color{#FF0000}{Username}$ should be changed to your own.
-
If the wef directory does not exist, create one manually.
-
The corresponding files in wef directory will be synchronously modified when you modify exceladdin/manifest.xml. If exceladdin/manifest.xml file is deleted or replaced, files in wef directory won’t be synced anymore.
How to use the service
1. Start esProc Desktop, and click on【Tools】->【Start Office Add-in Service】.
Check 【Auto-Start Office add-in service】 and restart IDE to automatically start the Office add-in service at the startup of SPL IDE.
2. SPL for Excel. Open Excel (The version number of Excel for Mac used in the following example is 16.89), and load the custom SPL for Excel add-in through 【Options】->【Add-ins】.
And you’ll get the following add-in:
3. Use =SPL.X() function in a cell.
FAQs
1. There isn’t the “Add-ins” option on the Excel Start screen.
Find【Add-ins】in【Options】->【Customize Ribbon】->【Main Tabs】->【Home】and check it.
If you cannot find 【Add-ins】, update orupgrade Excel.
2. Modify Office add-in program and update the dependency files, but the modification does not take effect.
Clear cache, and delete files from the two directories below:
/Users/$\color{#FF0000}{[username]}$/Library/Containers/com.microsoft.Excel/Data/Library/Caches
/Users/$\color{red}{[username]}$/Library/Containers/com.microsoft.Excel/Data/Library/Application Support/Microsoft/Office/
SPL.X() function
After the installation and configurations are finished, SPL.X() function will be added to Excel. It will execute the SPL script in an Excel cell and get the result set. The function’s return value is a single value, a one-dimensional array or a two-dimensional array.
SPL.X() has two sets of syntax:
-
SPL.X(exp, arg1, …)
Parameter description:
exp |
A SPL syntax expression string headed by =, which uses question mark ? to reference a parameter. ?1 corresponds to the first parameter, ?2 is the second parameter, and so on. |
arg1,… |
Parameter values. There can be 0 or one or multiple parameters (the number can be 30 at most). A parameter value can be a constant and can reference the current Excel cell (a single cell or a range). |
Example:
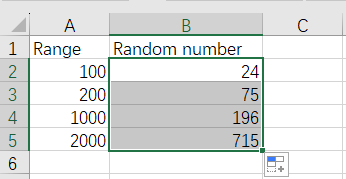
In the Excel file below, the 1st column is the range of random numbers, and the 2nd column generates a random integer within the specified range:
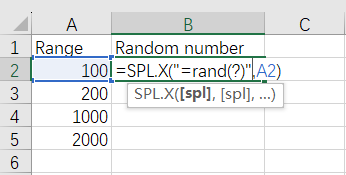
Perform the computation and get the following result:
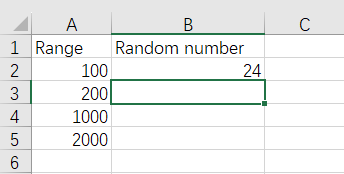
Drag cell B2 to every cell and get the following results:
To achieve complex computing requirements, execute the script file written in SPL. In this case, the function has the following syntax:
-
SPL.X(splxName(…), arg1,…)
Parameter description:
splxName() |
Script file name without extension; it always uses splx and must add () in the end. Parameters defined in the script file will match the specified parameters in the parentheses in order. It supports the relative path, which is relative to the SPL IDE’s main directory, or the absolute path. |
arg1,… |
Same as that for the previous syntax. |
Example:
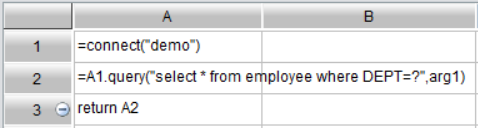
SPL.X() function can directly reference a SPL script file. For example, we save the SPL script file as【SPL IDE’s main directory】\Sales.splx:
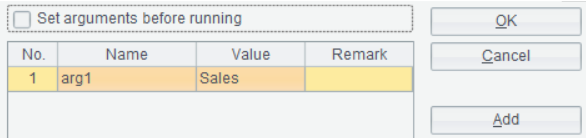
Define a parameter:
Type in an expression in the Excel’s cell A1 as follows:
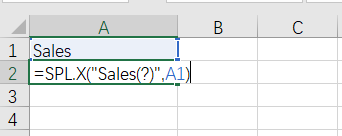
Where there are multiple parameters, the same number of question marks will be written in the parentheses. The correpondence rule between the question marks and the pass-in parameters is the same as that for the previous code – ?1 corresponds to the first parameter, ?2 is the second parameter, and so on.
Here is the result:

Office add-ins vs Excel add-ins
1. The systems on which they run are different.
Excel add-ins run on Windows, and Office add-ins run on Windows and Mac.
2. Office add-ins function is SPL.X()and Excel add-ins function is spl(). The two functions have different names, but they have same functionalities and syntax. Their more uses are explained in User Guide to esProc Excel Add-in where Excel add-in examples are cited.
When the return value is a one-dimensional array, Office add-ins and Excel add-ins have different configurations for the expanding mode:
Default expanding mode for Excel add-ins is horizontal. Check【Vertical display】through 【Add-ins】-【SPL】-【Show Setting…】 in Excel to change the expanding mode to vertical expansion.
Default expanding mode for Office add-ins is vertical. Check【Horizontal display for single-layer sequence】through【Start】-【Add-ins】-【SPL for Excel】 in Excel to change the expanding mode to horizontal expansion.
SPL Official Website 👉 https://www.scudata.com
SPL Feedback and Help 👉 https://www.reddit.com/r/esProcSPL
SPL Learning Material 👉 https://c.scudata.com
SPL Source Code and Package 👉 https://github.com/SPLWare/esProc
Discord 👉 https://discord.gg/2bkGwqTj
Youtube 👉 https://www.youtube.com/@esProc_SPL


Chinese version